File Commander/L V2.50
File Commander/L is a text mode style file manager and
shell that allows you to locate, copy, move, delete, view, edit and execute
your files in a quick, convenient and customizable manner.
It's main display provides dual directory view panels that may serve as
source and destination of a copy or move operation or just two different views
of your files. A panel may also be used to view a directory tree, drive
statistics or may be turned off altogether, making visible the output of
previously executed commands.
A command line is also provided and operates in conjuction with the directory
panels to make it much more powerful than a regular CLI including pasting file
names from the panel, a command history recall window and command completion
from history.
The following are some of the major features of File Commander/L:
- Built in archive support including archives inside archives to any depth. ZIP, ARJ, RAR, LZH, ACE, HA, GZIP, TAR, 7ZIP and BZIP2 types currently supported.
- Mouse support.
- Full Unicode file name support.
- User definable menu, featuring operators such as
- Run a command once for every tagged file.
- Automatically create a file containing a list of tagged files.
- Get input value from the user.
- List all tagged files in the parameter list.
- Online help.
- Many configuration options.
- Colourization of file and directory names by user definable rules.
- Built in file viewer with hex view mode.
- Built in editor with undo/redo.
- Built in viewer and editor have
- Full Unicode and code page support.
- Syntax highlighting.
- File Find facility combining wildcard file name filters with file contents scanning. The files found can be
- viewed or edited.
- copied or moved to a specified directory.
- modified with a search and replace operation.
- Calculation of the total disk usage of a directory tree.
- Tree views for quick and easy directory changes.
- Easy creation of Shortcuts.
- Enhanced wildcard handling including boolean operators (and, or, not, brackets) for combining multiple file name masks.
- Flexible file name filtering.
- Support for 4DOS/4OS2/4NT descriptions
- Support for variable size text window (minimum 80x25).
- Full support for large files and volumes (up to 2^63 bytes).
File Commander/L is copyrighted software. However, you are encouraged to
copy and share the software with others according to the following
requirements:
File Commander/L may be freely copied and shared with others, so long as
no charge is made for the software, and it is unmodified and copied in its
entirety, including program documentation. It may be distributed by
electronic means (modem, ftp etc), provided that all files are transmitted
(archived) together.
You may NOT charge anyone for a copy of this software other than a
small copying fee. You may NOT include this software with any commercial
software without the consent of the author.
This software is supplied WITHOUT ANY WARRANTY; without even the implied
warranty of MERCHANTABILITY or FITNESS FOR A PARTICULAR PURPOSE.
In no event shall the author be liable to you for any consequential,
special incidental or indirect damages of any kind arising out of the
performance or use of the software, even if the author has been advised of
the possibility of such damages. By using the software, you agree to these
terms.
To find the latest version of File Commander/L, try the following places:
FC/L has an online help facility that may be called up using the F1 key. For
it to work, you must have the file fcl.fch in
the /usr/share/filecommander/ directory.
The text called up will depend on what state FC/L is in when F1 is pressed. There
are separate help texts for the following:
- The main FC/L screen
- Each of the 5 Menus
- The Configuration window
- The Confirmations window
- The internal viewer
- The internal editor
- File Find
- Attribute Change
- The history window
- Directory Compare
- Edit User Menu
- Edit Associations
- The help window
When there is more text than will fit in the window, you can use the Up / Down
arrow, Page Up, Page Down, Home and End keys to move around or you can click
the mouse in the top or bottom thirds of the window to scroll it (like in the
Internal Viewer).
The file panels are central to most operations in FC/L. They allow you to
browse through the files on your drives, copy, move, rename and delete files
you select from them as well as view, edit or execute any file.
Normally, one panel will be active and the other will be inactive. The
active panel is indicated by having its title highlighted. To change the
active panel, press the TAB key or click the mouse on the panel you wish to
become active.
At any time, either or both panels can be hidden, allowing you to view the
screen behind which will contain the output of any programs you've run. Press
Ctrl-O to hide / re-display all visible panels or Ctrl-F1/F2 to switch the
Left/Right panel on or off.
If you feel that the information in a panel is no longer up to date, you
can press Ctrl-R to re-read the information displayed in the panel. Note that
this may take some time for Tree view panels if you have a large number of
directories on your drive.
The panels can display a list of files in several different ways. To change
the style of view, select it via the
Menu (Left or Right, depending on which
panel you wish to change). You have the choice of:
- Brief
- Displays three columns of file names with no details.
The status line at the bottom of the panel displays the details as in Full
view for the current file.
- Full
- Displays file names with their size and the date and
time of last modification. The status line is devoted entirely to displaying
as much of the file name as possible allowing you to see more of a long file
name than in the main section of the panel.
- Wide
- Displays file names with their size, providing much more
space for the file name. This mode is most useful when viewing directories
with many long file names.
- Brief-Wide
- Like Brief view in that it has no details but divides the panel into only 2 columns instead
of 3, providing more space for long file names.
- Unix
- Similar to Full but instead of date and time, the unix permissions, owner and group
are displayed. The status line shows the size, date & time;
- Tree
- Views the overall directory structure of the current drive
of the opposite panel. Unlike in the above modes, when a panel is
in tree mode, it is linked to the opposite panel in that selecting a directory
on the tree and pressing ENTER causes the opposite panel to view that directory.
- Info
- The Info panel displays drive summary information for the
current drive of the opposite panel. Details listed include total
space, free space, label, file system and serial number. In addition, if the
drive is mapped to network server or a peer share then the mapping
of the drive is shown. If the opposite panel is viewing the contents of an archive,
the panel shows total uncompressed size, total compressed size and compression ratio instead.
You can quickly activate an Info panel using Ctrl-L. While the Info panel is active the label
can be edited by pressing Alt-L.
The lower section of the panel displays "Dir Info" if any exists. This is just the contents of
a file called dirinfo in the directory of the opposite panel and is intended to contains a description
of the directory. The contents can be edited by pressing F4 or double clicking the Dir Info area.
Changing between views can also be achieved using the quick keys
- Alt-Shift-F1
- Brief
- Alt-Shift-F2
- Full
- Alt-Shift-F3
- Wide
- Alt-Shift-F4
- Brief-Wide
- Alt-Shift-F5
- Unix
The file listing type panels (Brief/Full/Wide/Brief-Wide) can be configured to display user
defined classes of file using special colours. To define a class of file you need to
add a line to your fcl.ini in the [Colours] section (this can be done
most easily by selecting Edit Associations from the Commands menu) that looks like
expression : [colour] [ON colour]
where expression is any valid Boolean expression
and colour is one of
- black
- blue
- green
- cyan
- red
- magenta
- yellow
- white
and can have an optional "bright" in front of it. If you don't specify the background colour the default will be used.
The same applies to the foreground colour. Only the first three characters of a colour name is significant so you
can write green as just gre.
E.G. to make executable file names appear in bright white on the standard background
%perm=x : bright white
To make read-only files appear in dull white
%attrib=r : white
To make archives appear on a black background, without affecting the foreground colour
*.{zip,arj,rar,lzh,ace} : on black


Colourization of directory names is configured in a separate section starting with
[Directory Colours] using the same syntax as the [Colours] section.
When you have a list of files showing (which is most of the time) you can
move around the list using the following keys:
- Up Arrow
- Move up one file name.
- Down Arrow
- Move down one file name.
- Page Up
- Move up one screenful of file names.
- Page Down
- Move down one screenful of files names.
- Home
- Move to the first file name
- End
- Move to the last file name.
- Alt-[printable char]
- Move to the first file starting with
[printable char]. If you continue to type printable characters, FC/L will
look for a file starting with the string you've typed. Your typing is displayed
in the status line of the current panel.
- Shift-TAB
- After using the above, Shift-TAB will complete the seek text from the available file names.
EG if you had the following files in the current panel:
afile.txt
bfile.txt
cfile1.txt
cfile2.txt
cfile3.txt
cfile4.txt
dfile.txt
You could seek to cfile3.txt by typing Alt-C, Shift-TAB, 3.
- Alt-Up/Down
- These keys serve two functions. If the cursor has just been moved using the
above function, they move to the previous/next file name matching the partial
name displayed in the status line. Otherwise they move to the first tagged file
above/below the current position.
When the current panel is in Brief mode, The left and right arrow keys move
across one column.
You can move around your directories by
moving the cursor to a directory you want to change into and pressing ENTER.
Selecting ".." moves to the parent of the current directory.
Moving the cursor around the list of files in the current directory is
achieved using the Up / Down arrows, Page Up, Page Down, Home and End.
Double clicking the mouse on a directory name has will also change into that
directory. The full path of the current directory is always shown on the top
line of the panel.
You can also choose to navigate the local network using UNC style paths. On
the drive change dialog, press the backslash key or choose \\ in the drive
list to view the list of available servers in the file panel. Selecting one
of these (using Enter or mouse double click) will display a list of shares on
that server. Selecting a share will display files & directories in the
normal way. Note that until you reach this point many operations are not
possible. EG using F5 to copy a server doesn't make any sense.
Other useful keys for navigating around your drive are:
- Ctrl-\
- Move to the root directory of the current drive.
- Alt-Home
- Move to the user home directory, as determined by the HOME environment variable.
- Ctrl-Shift-\
- Change to the same directory as the opposite panel.
- Ctrl '-'
- Move back to the previously viewed directory. Note that this is only for
the '-' on the main keyboard, not the numeric keypad (which has its own
function).
- Ctrl-Page Up
- Move to the parent of the current directory
(same as selecting "..").
- Ctrl-Page Down
- Move into the currently highlighted directory
(same as pressing ENTER except that the contents of the command line is
ignored).
- Ctrl-G
- Go to a symbolic link's target.
- Ctrl-M
- Choose a mount point. This pop-up displays a list of currently mounted file systems, giving their device,
mount point, size and free space. Selecting a file system with ENTER will change the current panel to show
the root of that file system. Alt-E can be used to eject removable devices.
A number of other methods can be used to find the directory you want,
including:
The Change Directory Tree can be used to quickly locate and display the
directory you're looking for. To activate it, press Alt-F10 or select it from
the Commands Menu. You can then
either browse through the tree structure using the same keys as used to browse
through a file panel, or you can start typing the name of the directory you
are looking for.
As you type, the view will jump to the first directory name
matching what you have typed so far. You can either keep typing until the
directory you're looking for is located or you can use Ctrl-Enter to find the
next match of what you've typed.
Alt-Up/Down can be used to jump to the previous/next directory at the same level,
skipping all child directories in between.
When you've found the directory you want, press ENTER to make it the current
directory of the current panel. You can exit the Change Directory Tree at any
time by pressing ESC.
If you have not previously viewed the tree of the current drive it must be
read and this may take some time on a large drive. Once it has been read, the
tree structure for the drive is saved to a file for future reference. Normally
this file (fc2tree.dat) is written to the root directory of the drive the file
describes. If you don't like this or if it's not possible (eg CD-ROM drives) you
can make FC/L store all tree data files in one directory of your choice. To do
this, change the Tree Data Directory setting in Options/Configuration to
specify the directory where you want the data files.
If at any time you believe the tree being shown is not correct, you can
re-read the tree structure by pressing Ctrl-R.
By default, the entire tree is shown but parts of the tree can be collapsed and expanded
by using the following keys:
- Grey +
- Expand the current tree node.
- Grey -
- Collapse the current tree node.
- Ctrl-Grey +
- Expand the current tree node and all sub-nodes.
- Ctrl-Grey -
- Collapse the current tree node and all sub-nodes.
The Directory History pop-up allows you to change the current panel to a directory
that has been viewed recently. To activate it press Alt-\, Shift-Alt-F8 or select
'Directory History' from the Commands menu. You will then be presented with a list of
recently visited directories in oldest to newest order. Pressing ENTER or double clicking
an entry will cause the current panel to change to the selected directory.
Up to 100 directories visited by both panels are listed with duplicate entries removed, leaving
just the most recent occurrence of a particular path. The entries are not persistent so are
lost when you exit FC/L.
The File Find function can be used to search for a particular
file. To activate it, press Alt-F7 or select it from the
Commands Menu.
There are six controls on the File Find dialog that you can use to control
the search. Use TAB to jump between control groups and the arrow keys to move between the individual controls.
These are:
- File(s) to Find
- The name of the file you're looking for. The name can contain any of the
wildcard characters and boolean operators described in
File Mask Boolean Expressions.
- Containing
- A text string that a file must contain in order to be considered a match.
It will also be the "From" string when doing a Multi-File Search & Replace.
- CP
- Code Page to use when searching non-unicode files for the text string
in the "Containing" field.
- Case Sensitive
- Normally files are searched for the Containing text without matching
case. Check this option to make the search case sensitive.
- Whole Word
- Makes the Containing test match Whole Words only.
- Expand Matches
- Show a search result for every occurrence of the search string in the file.
- Start at Root
- If this option is checked (default) the file search will begin at the root
of the current drive. If not, it will begin in the current directory of the
panel that was active when File Find was activated.
- Scan Subdirectories
- When checked, the search will recurse into the subdirectories of the
starting directory, otherwise only the starting directory is searched.
- Depth
- When Scan Subdirectories is enabled, this option specifies a limit on the depth of subdirectories to recuse into.
Blank or 0 means unlimited.
- Follow Directory Symlinks
- When checked, the search for files will follow symbolic links to directories and search the link's
target directory.
The File(s) to Find and Containing fields have a history recall
facility to save retyping commonly used values.
Use TAB / Shift-TAB and Cursor Up/Down to move between these fields entering your search data, then
press ENTER or click Find to begin the search. As matches are found, they are listed with
their full path in the top section of the File Find window. You can stop the
search at any time by pressing ESC. You can do this to save time if the file
you're looking for has been located but much of the drive has yet to be searched.
Once there are some matches showing you can navigate the list
using the Up / Down arrows, Page Up/Down, Home/End or clicking
with the mouse. Pressing ENTER or double clicking the mouse on a file name will
return to the file panel with its current directory changed to that of the selected
file and with the selected file highlighted.
You can also view or edit a file from the list using F3 or F4 respectively.
If you used the Containing field and you use FC/L's internal viewer
or editor, the starting position will be that of the first match. If the search hasn't
yet finished it will continue in the background while you are viewing or editing.
A file in the list can be deleted using F8 or all files in the list can be deleted using Shift-F8.
Note that this doesn't just remove it from the list but deletes the actual file.
This can be handy if you are using File Find to locate junk files that you want to remove.
If you just want to remove a file from the list, this can be done by pressing Delete.
Once the search has finished the status line under the results list will display
Search Complete with a summary of the files found. Alternatively if you stopped
the search with ESC it will display Search Stopped. The list can be resorted by
pressing Ctrl-F3..F6 to sort by name, extension, time or size.
The files in the list can be copied or moved using F5/F6. The default target is that of
the non-current file panel, just like if you'd used F5/F6 from the current file panel.
The name of file in the list can be copied to the clipboard with Ctrl-Shift-J for just
the name or Ctrl-Shift-F for the full path.
If you do not want to see any of the files found you can press ESC to exit
File Find (or click Cancel). To start a new search, change the appropriate fields
then press ENTER.
Whichever way you exit the File Find dialog, you can recall the list of files
found by the last search by pressing Shift-Alt-F7. This can be very handy if
you wish to examine each matched file in turn.
This is a function of the File Find dialog, activated by pressing Ctrl-R (for Replace).
After searching for files using a value in the Containing field, press Ctrl-R and enter the replacement text.
Once confirmed, all occurrances of the value in the Containing field will be replaced with the given
replacement text in all files listed in the search results.
The Case Sensitive and Whole Word options from the File Find dialog will apply during the search and replace.
BE CAREFUL as this function can potentially ruin many files if you ask it to do the wrong thing and there is no undo.
To speed up access to your most frequently used directories you can store
the current directory path in one of ten 'slots'. At a later point in time you
may recall the directory which causes the current panel to instantly move to the
stored directory.
-
To store the current directory, hold down Ctrl and Shift then press one of
keys 0-9 on the numeric keypad.
-
To retrieve a directory, hold down Ctrl then press one of keys 0-9 on the
numeric keypad.
If you forget which directories you've assigned to which keys, you can view
the contents of the slots using Alt-F5. This lists all ten stored paths from
which you can select one to change to using the Up / Down arrow keys and ENTER,
clicking on one with the mouse or pressing a number from 0-9. You can also set
one of the entries to the current directory using Insert or clear an entry
using Delete.
If you do a Save Setup before exiting FC/L, the directories you've stored
will be remembered the next time you start it up.
These three operations are all performed in a similar way. All can be
performed on either a single file or a group of files. To operate on a single
file, simply move the highlight bar to the file you want to copy/move/delete
using the keys described in
Moving Around the Current Directory
and press F5 to copy, F6 to move and F8 to delete. These keys (along with the
rest of the function keys) are listed at the bottom of the screen so you don't
have to memorize them.
If you want to operate on a number of files at once, you should tag
the files you wish to be affected (See
Tagging). It's also possible to use Shift-F8
to delete a single arbitrary file.
If you select copy or move, you will next be presented with a dialog box that
allows you to specify the destination directory and file name. The default
destination is the directory showing in the opposite panel. If this is what you
want, just press ENTER to proceed, otherwise use the arrow keys, Delete,
Backspace etc., to alter the path to what you want. You can also change the
file name if you wish. The target directory can also be chosen from either a
Directory Tree using F10
or from the Directory History using Alt-\.
You can also use Shift-F5/F6 if you want to copy a file to the same directory with
a minor name change or if you want to rename a file in place without turning off the
opposite panel. The only difference with the Shifted variation of F5/F6 is that the
default target doesn't include the path of the opposite panel. If you realize that you
wanted this function but have already pressed F5 or F6 you can get the same result by
pressing the same function key again while the Copy / Move dialog is showing.
You can rename several files at once using wild card characters '*' and '?'.
For example, to change the extension of several files to .bak you would specify
the destination file as '*.bak'. The wildcard characters represent characters
taken from the source file name.
If you select delete, you will be prompted with a confirmation dialog. If
you're sure you want to go ahead with the delete, press Enter, 'y' or click
'OK'. To back out, press ESC, 'n' or click 'Cancel'. If there are files tagged
you will be warned and asked a second time to confirm the delete. This is to
make sure you haven't forgotten that some files are tagged which can happen if
the tagged files have been scrolled off the panel. Either or both of these
confirmations can be disabled if you wish (See
Confirmations).
All of the above operations can be stopped mid-process by pressing
ESC.
You can delete any single file, regardless of the state of the current panel, using
Shift-F8. This displays a dialog that allows you to enter the full or relative
path of any single file or directory that you want deleted. The default name is that of the
file the panel cursor is currently on, allowing easy deletion of a single file in the
current panel when in the middle of tagging a number of files for some other operation.
There are several commands available to tag files. These are:
- Insert
- Pressing the Insert key toggles the tag for the currently
highlighted file and moves the highlight down to the next file allowing you
to repeatedly press Insert to tag multiple files.
- Grey +
- Pressing the '+' key on the numeric key pad pops up a dialog
into which you can enter a file name mask to specify which files should be
tagged, as described in File Mask Boolean Expressions.
- Grey -
- This is just like Grey + except that it
untags files that match the file mask.
- Grey *
- Invert tagging. All untagged files become tagged and all
tagged files become untagged.
- Ctrl-Grey +
- Tag all files.
- Ctrl-Grey -
- Untag all files.
- Compare directories
- Selecting Compare Directories from the
Commands Menu or pressing Ctrl-K tags
files based on differences between the two panels.
- Restore Selection
- Selecting Restore Sel'n from the Files menu or pressing Alt-Grey-+
returns the current panel to the state of tagging as it was before the last F5-Copy
command. This allows you to re-copy or perform some other operation on the same set of
files as was just copied.
- Mouse
- Clicking the right mouse button on a file name toggles the
tagging for that file. Holding the right button down and moving the mouse will
tag / untag all files touched.
If the Tag Directories option is not set, only Insert
and Mouse allow you to tag directories. The other tagging methods
ignore directories. When the Tag Directories option is
set, all the above commands except Compare directories affect
directory tagging.
The effect of the Tag Directories option
can be overridden by combining Shift with any of the mass tagging
commands above. It can also be toggled inside the Grey + dialog using
Alt-D but will only affect that one tagging operation, allowing you to chose
if you want directories included while entering the file name mask.
When any files are tagged, a summary of the tagged files is shown on the
status line of the panel. This shows the number of files tagged and their total
size.
File Commander/L provides a boolean expression parser that allows you to select files using
powerful expressions. A file name mask is made up of regular characters and any of the following wildcards.
- *
- Substitutes for zero or more characters of any value.
- ?
- Substitutes for one character of any value.
- [a-d]
- Substitutes for one character of value a, b, c or d.
- [^a-d]
- Substitutes for one character of any value except a, b,
c or d.
- [a-d^c]
- Substitutes for a, b or d.
- {fred,joe,foo}
- Substitutes for any one of the comma separated strings.
If the file name mask needs to include any of the operator characters described below
it should be quoted with double quotes. EG "foo(*).txt".
Multiple file name masks can be combined using the following operators.
- |
- The OR operator, give a match if either of the expressions given match.
IE "*.cpp | *.h" will match all .CPP and all .H files, and is equivalent to "*.{cpp,h}".
- &
- The AND operator, give a match if both expressions match.
IE "*x* & *y*" will match any file that contains both an X and a Y. The AND
operator has higher priority than the OR operator, so "a* & *b | c* & *d" is
equivalent to "(a* & *b) | (c* & *d)".
- !
- The NOT operator, reverses the match / no match result of any
expression. "!*x*" will match any file that doesn't contain an X.
- ( )
- Brackets can be used to force order of operations override, as in
mathematical expressions.
Also available are a number of operators that can be used to select files by criteria other than their names.
These are used by writing an expression that consists of the file operator (listed below),
a logical comparitor ( one of <, >, =, !=, >= or <= ) and a value. The value can have a single letter suffix
to specify the units it's in.
- %age
- Represents the amount of time between the file's last modification and the present. Value is in seconds by default or can be
followed by a suffix to specify minutes, hours or days.
- %attrib
- Represents the file's attributes. Use of the = operator actually means has the attribute. The != operator can also be used
to mean doesn't have the attribute. The value can be any combination of the letters R,H,S,A,D.
- %date
- Represents the file last modification date. The comparison value is a date in your local date format. The year
may be given as either 2 or 4 digits. A year of less than 70 will be interpreted as 21st century.
- %size
- Represents the file size. The comparison value is in bytes unless followed by a suffix kilobytes, megabytes or gigabytes.
- %owner
- Represents the unix owner name of the file.
- %group
- Represents the unix group name of the file.
- %perm
- Tests if you have permission to read, write or execute a file/directory.
The test takes into account the file's permissions, the user's id and the groups the user belongs to.
Use of the = operator actually means has the permission.
The != operator can also be used to mean doesn't have the permission.
The value can be any combination of the letters R,W,X.
Examples
- *.bak & %age > 30d
- Match backup files that are older than 30 days.
- *.{exe,cmd,bat,com}
- Match only executable files.
- *.doc & %date >= 1/5/98 & %date <= 31/5/98
- Match documents last modified in May 1998 (in date format used in Australia).
- %attrib = RH
- Match files that are both read-only and hidden.
- %perm = X
- Match files that you have permission to execute.
- %perm != R
- Match files that you don't have permission to read.
The Compare Directories function provides a way to detect and, if desired,
eliminate differences between two similar directories. The uses of this
function are many but the most common use is synchronizing two copies of a set
of files.
When selected, FC/L identifies differences in the file lists
of the left and right panels, tagging files according to the options selected.
Most of the options are used to decide which files are tagged if a file name
appears in both file lists.
- Date/Time
- Determines if the older, newer, both or neither copies of the file are
tagged if the dates on them are different.
- Size
- Determines if the larger, smaller, both or neither copies of the file
are tagged if the size of them are different.
- Tag Unmatched
- If a file name appears in one panel but not the other, this option
causes it to be tagged.
- Compare Contents
- This is the brute force method. The two copies are compared byte for
byte to check if there is any difference. If there is, both will be
tagged.
- Mask
- Only files that match by this File Mask
will be considered for tagging. The default value is "*" which matches all files.
To create a subdirectory in the current directory, press F7 and enter the
name of the subdirectory you want to create into the dialog. If the current
panel is in tree view mode, the directory will be created in the directory
the highlight is currently on.
If you want to get an idea of what's taking up your precious disk space it's
often useful to calculate how much space is used by a particular directory and
all its sub-directories. File Commander/L allows you to do this for one or more
of the directories showing in a file panel.
To calculate the size of a directory, move the highlght on to the directory
you wish to know the size of and press Ctrl-Q. This may take some
time if there are a large number of files or sub-directories in the directory
being calculated. When the directory has been scanned its total size is
displayed in the same field as where a file's size is displayed instead of the
word SUBDIR.
If you want several of the directories in the panel to be calculated, tag
them before pressing Ctrl-Q and all will be calculated. Calculating
all of the directories provides a useful breakdown of where your disk space is
being used.
If you decide that the calculation is taking too long you can cancel it at
any time by pressing ESC.
Normally, the result of the size calculation is discarded when you change to another
directory. If you want to browse through the directories that were calculated while retaining
the calculated size display, set the Retain Dir Count option on the
Options Menu.
Detailed file meta-data can be displayed by pressing Ctrl-I or selecting "File Information"
from the Files menu. Details displayed are:
- File size, both full detail and shortened.
- All supported time stamps with maximum supported resolution.
- File type.
- File mode.
- Number of hard links.
- File owner, with numeric id and full name.
- File group, with numeric id.
- If file is a symbolic link, the target of the link.
To create a new archive from a selection of files, press Shift-F7. You will be prompted for the path and
name of the archive to be created as well as the type of the archive. The default path is that of the
opposite panel. The default name is that of the file that the cursor is currently on without its extension.
When you select OK, FC/L will call the selected archiver program to
create the archive.
There are several ways to start a program using FC/L.
-
Move the highlight bar to an executable file and press
ENTER.
-
Move the highlight bar to a file which matches a defined
Association and press ENTER.
-
Select a program from the
User Menu.
-
Enter the program name on the
Command Line.
With all these methods, except the User Menu, you can start the program in
a separate session by pressing Alt-Enter instead of just Enter.
After the program has finished, its output can be viewed by turning off the panels if
necessary with Ctrl-O (or Esc if ESC Panel Switch option is turned on).
If there was more output than will fit in the window, you can scroll back using Ctrl-B.
This activates the output browser which can be controlled using the up/down arrows, Page Up,
Page Down, Home and End keys. Esc exits the browser.
The way FC/L goes about starting the program depends on what type of
executable it is. The following types are recognized:
- Terminal
- Started within the FC/L session unless Alt-Enter was used.
- X Windows GUI
- X Windows GUI apps are automatically started detached so there is no need to use
Alt-Enter to make sure you can still use FC/L while the program is running.
You can force the program to stay attached to FC/L, allowing you to see any
text output on standard out/error by prefixing the command with a #.
FC/L will invoke a command interpreter (as specified by $SHELL) to run
the program.
When FC/L starts another program the environment variables passed to it will normally be
the same as FC/L inherrited from its parent process. The enviromnet passed to programs
started by FC/L can be altered in two ways.
- Using a set command on the command line. This will change the environment variable for the current
session only.
- Edit the fcl.ini file using the
Commands/Edit Associations menu option and add a line to the
[Environment] section that looks like
ENVVAR=VALUE
This makes a permanent change to the environment of programs started by FC/L.
An association is used to link data files to the program that uses them.
To create an association, add a line of the following form:
mask : program
to your fcl.ini file using the
Commands/Edit Associations menu option.
The mask can be any valid Boolean expression.
You can also use the following when specifying the command to be run:
- !
- Name of current file.
- !x
- Name of current file without its extension.
- !p
- Path of current panel.
- !P
- Path of opposite panel.
- !f
- Name of current file with full path.
- !F
- Name of current file in the opposite panel with full path.
- !s
- Path of current panel with trailing '\'
- !S
- Path of opposite panel with trailing '\'
- !n
- Nothing, but prevents automatic appending of current file name
- !!
- A literal, single !
If none of the above are used, the name of the current file is appended.
EG
- *.dsk:
- loaddskf ! a:
- *.inf:
- view
- *.ico:
- iconedit
- *.cpp:
- make !x.exe
- *.{gif,jpg,bmp}|os2logo:
- pmview
FC/L has a built in scripting language that you can use to automate tasks that would be tedious to do manually.
The language is C-like in its core syntax but more like Javascript in the way it deals with data values.
Variables are dynamically typed and implicitly defined.
Scripts have an extension of .fcs (for File Commander Script) and will be run automatically by FC/L when you
press ENTER on one. You can type a script name on the command line, in user menu items and associations. The PATH will be searched
for the named script just like any other executable type.
FC/L can be invoked just to run a script using the -s switch followed by the script file name.
A variable or expression value can be one of the following types.
There is no "main" function so the simplest script can consist of a single line of code. EG
println( "Hello world!" );
is a valid script.
Looping and Conditional Execution
The common if/else and looping constructs are supported. The break keyword can be used to terminate any loop.
- if
if ( a < b ) {
  println( "a is less than b" );
} else {
  println( "a is not less than b" );
}
- while
counter = 0;

while ( counter < 10 ) {
  println( counter );
  counter++;
}
- do while
counter = 0;

do {
  println( counter );
} while ( ++counter < 10 );
- for loop,C style
for ( counter = 0; counter < 10; counter++ ) {
  println( counter );
}
- for loop,iterator
list1 = [ 1,3,5,7,9 ];

for ( item : list1 ) {
  println( item );
}
Expressions
The following operators are supported.
- ,
- The comma operator separates a number of expressions and returns the value of the last one.
- =
- The assignment operator stores the value of the right hand side expression in the left variable or other assignable expression, including map or list items.
- += -= *= /=
- These versions of the assignment operator combine a mathematical operation with the assignment. EG a += b is equivalent to a = a + b.
If the left hand side is a list, the += operator will add an item to the end of the list.
- ? :
- The conditional operator selects between two values. It takes 3 values in the form a ? b : c. If a is true, b is returned, else c.
- |
- Logical OR operator.
- &
- Logical AND operator.
- ==
- Logical equality operator.
- !=
- Logical not equals.
- <
- Less than comparision.
- <=
- Less than or equal comparision.
- <
- Greater than comparision.
- <=
- Greater than or equal comparision.
- +
- Addition.
- -
- Subtraction.
- *
- Multiplication.
- /
- Division.
- %
- Modulus.
- ^
- Exponentiation.
- !
- Logical negation.
- []
- List/Map item access.
- .
- Alternate syntax for map item access. m.foo is equivalent to m["foo"].
- ()
- Mathematical expression grouping to override precedence rules.
- ++
- C style Pre/Post increment
- --
- C style Pre/Post decrement
Literal values
- bool
- The keywords true and false.
- int
- A regular base 10 value is just a string of decimal digits. A hexadecimal number can be specified with a 0x prefix followed by a string of hexadecimal digits.
- real
- A string of decimal digits with a single decimal point somewhere. Must start with a digit.
- string
- A string of Unicode characters surrounded by double quotes. Backslash is the escape character so double quote can be included in the string by preceding them with a backslash.
Other escape sequences supported are \n (line feed), \r (carriage return), \t (TAB).
- timestamp
- No literal values supported.
- list
- A list of values surrounded by square brackets and separated by commas.
- map
- A list of key/value pairs, surrounded by curly brackets and separated by commas. The key and value are separated from each other by a colon.
EG aMap = { 4 : "four", 5 : "five", 6 : "six" };
Built-in functions
- askConfirm( string title, [string|list] question )
- Prompt the user with a question with OK & Cancel options.
Returns true if the user selects OK.
The second parameter may be either a single string or a list.
If a list is provided, each list element will be a line in the dialog, converted to a string if it isn't already a string.
- cd( string directory )
- Change the current panel's working directory to the provided directory.
The directory parameter can be relative or absolute and is similar to running a
cd command on the command line except that it won't do a tree search if the directory
isn't found.
- colour( int fg [, int bg] )
- Set the colour for text output by print/println functions.
The colour values are numbers between 0 and 15 which map to FC/L's set of 16 colours.
- contains( string str, string searchFor )
- Returns true if str contains the sub-string searchFor.
- containsNc( string str, string searchFor )
- Returns true if str contains the sub-string searchFor, case insensitive.
- copy( string target[, list options] )
- Perform a copy operation, similar to the F5-Copy function. Tagged files will be copied to the
specified target directory. The optional list of options can be used to specify any of the following:
OverwriteAll, OverwriteNone, OverwriteAllOlder, DerefSymLinks.
- copyFile( string fromName, string toName [, list options] )
- Copy a single file to the specified file name. toName should be a file name, with path if needed, but should not be
just a target directory. Supported options are "Overwrite", "NoOverwrite" and "OverwriteOlder". If none of these are specifed
and the target file exists, an overwrite confirmation prompt will be displayed.
The return value is a virtual type that behaves like a bool that is true if the operation succeeded, but can be passed to the
getMessage() function to provide an error message that describes the reason for a failure.
- createText( string fileName )
- Create a text file for writing. The return value is a virtual list which, when appended to with the += operator,
will write a line of text to the file.
- deleteFile( string fileName )
- Deletes the named file.
The return value is a virtual type that behaves like a bool that is true if the operation succeeded, but can be passed to the
getMessage() function to provide an error message that describes the reason for a failure.
- dirExists( string dirName )
- Returns true if the named directory exists.
- edit( string fileName[, int offset ] )
- Launches the internal editor.
- endsWith( string str, string searchFor )
- Returns true if str ends with the sub-string searchFor.
- exec( string command )
- Executes a child process and returns its output as a list of strings, one per line of output. If the process fails to launch, the return value is a boolean false.
- exists( string fileName )
- Returns true if the named file system object exists. It may be a file, directory or anything else the OS allows to be stored in the file system.
- expandTimestamp( timestamp ts )
- Expands the time stamp into its components. The return value is a map containing integer values with the keys
day, month, year, hour, minute, second, nanosecond, weekday.
- fileExists( string fileName )
- Returns true if the named file exists.
- fileFind( string searchExpression, map options )
- Performs a File Find, like Alt-F7, returning a virtual file list similar to the files() function.
searchExpression is the boolean expression describing the file name pattern to look for.
The options map specifies the options available in the File Find dialog. The map keys are
- containing
- string, default none, a string to search for in the file.
- startAtRoot
- bool, default false, enables searching from the root.
- scanSubdirectories
- bool, default true, enables recursive searching.
- depth
- int, default 0, specifies a limit on the depth of subdirectories to recurse into. 0 means unlimited.
- followDirectorySymlinks
- bool, default false, enables following directory symbolic links when recursing.
- caseSensitive
- bool, default false, enables case sensitive matching of the containing string.
- wholeWord
- bool, default false, enables whole word matching of the containing string.
EG
foundList = fileFind( "*.fcs", { "containing": "fileFind", "caseSensitive": true } );

for ( f : foundList ) {
  println( f["name"] );
}
- files()
- Returns a virtual list that represents the list of files in the current panel.
Each element in the list is a virtual map that has a fixed list of keys, the values of which provide details of the
file panel entry. The keys provided are: name, size, mtime, directory & tagged.
The directory map item is a boolean, true if the entry is a directory, false otherwise.
The tagged map item can be set to true to tag that panel entry.
- free( variable )
- Releases the value referenced by the variable. This can be used to close a file handle as returned by openText() or createText().
It can also be used to explicitly free memory used by a complex data structure.
- getClip()
- Returns a string of the clipboard's current contents.
- getCurrentDir()
- Returns the current panel's working directory.
- getEnvVar( string varName )
- Gets an environment variable.
- getMessage( returnCode )
- Returns an error message describing the reason for a low level file operation's failure.
The returnCode parameter must be a value returned from one of the low level file functions like copyFile().
- getStoredPath( int position )
- Returns the stored path (as in Alt-F5) in the given position.
- keys( map aMap )
- Returns a virtual list containing the keys of the provided map.
- left( string str, int length )
- Returns a string consisting of the left length characters of str.
If str is no more than length characters long, str is returned unchanged.
- len( string | list | map value )
- Returns the number of elements in the passed value.
- lowerCase( string str )
- Returns str with all characters converted to lower case.
- lpad( string str, int length )
- Returns a string padded with spaces on the left to bring it up to length characters long.
If str is longer than length, it will be truncated to length characters.
- ltrim( string str )
- Returns str with all whitespace stripped from the left of the string.
- mid( string str, int offset[, int length] )
- Returns a sub-string of str, starting at offset characters from the start and length characters long.
If length is not provided, the entire remander of the string will be returned.
- mixedCase( string str )
- Returns str with mixed case. Uses the same logic as the "File Case" function in mixed mode.
- moveFile( string fromName, string toName [, list options] )
- Move a single file to the specified file name. toName should be a file name, with path if needed, but should not be
just a target directory. Supported options are "Overwrite", "NoOverwrite" and "OverwriteOlder". If none of these are specifed
and the target file exists, an overwrite confirmation prompt will be displayed.
The return value is a virtual type that behaves like a bool that is true if the operation succeeded, but can be passed to the
getMessage() function to provide an error message that describes the reason for a failure.
- now()
- Returns a timestamp of the current date/time.
- openText( string filename )
- Opens an existing text file for reading. The return value is a virtual list with each element being a line of text.
The file can be read by iterating the returned virtual list with a for loop.
- pad( string str, int length )
- Returns a string padded with spaces on the right to bring it up to length characters long.
If str is longer than length, it will be truncated to length characters.
- pathSplit( string filename )
- Splits a file path into its components. Returns a map containing the following elements:
- path
- The full path of the directory containing filename.
- fileName
- Just the name of the file, not including any directory path.
- fullName
- The full absolute path of filename. If filename is already an absolute path, fullName will be the same
but if it is relative, fullName will be the resolved full path.
- extension
- The part of the file name after the last dot.
- extensions
- The part of the file name after the first dot.
- pick( list | map pickList [, map options] )
- Presents a pick list to the user. The list can be either a map or a list. If a list is provided, the pick list displays
the string representation of each list item. If a map is provided, the pick list displays the string representation of each map value.
If the user chooses an item, the return value is either the list item value or the map key of the chosen item.
The optional second parameter can provide some options for the pick list. The options supported are:
- title
- A string that will be displayed at the top of the pick list.
- allowedKeys
- A string that contains a list of characters that, besides ENTER, can be used to select an item. The key pressed by the user is
stored in the options map as the value of the "keyPressed" key.
- pos( string str, string searchFor )
- Returns an integer offset of where the sub-string searchFor appears in str, or -1 if it does not.
- posNc( string str, string searchFor )
- Returns an integer offset of where the sub-string searchFor appears in str, or -1 if it does not, case insensitive.
- print( value{, value} )
- Prints one or more values as text to the console. Any value that is not already a string will be converted to a string
so any type can be passed.
- println( value{, value} )
- Just like print execept that a new line is output after all the values.
- putClip( string str )
- Store the provided str on the clipboard.
- right( string str, int length )
- Returns the right length characters of str.
If str is no longer than length characters, str is returned unchanged.
- rtrim( string str )
- Returns str with all whitespace stripped from the right of the string.
- run( string command )
- Executes the provided command, just like if entered on FC/L's command line.
- saveSetup()
- Saves the current settings, IE Shift-F9.
- setEnvVar( string varName, string value )
- Sets an environment variable.
- setStoredPath( int position, string path )
- Sets the stored path (as in Alt-F5) in the given position.
- sleep( real seconds )
- Stops and waits for the specified number of seconds.
- split( string str, string separator )
- Splits a string str into parts separated by separator. Returns a list of strings.
- startsWith( string str, string searchFor )
- Returns true if str starts with the sub-string searchFor.
- subst( string str, string from, string to )
- Replaces all occurances of from in str with to and returns the result.
- synchronize( string sourceDir, string targetDir, list options [, string fileFilter [, dirFilter]] )
- Initiate a Synchronize operation with the provided criteria. The analysis of differences is performed immediately
but the list of operations will still be presented for confirmation before being acted on. The supported options are:
CopyMissing, UpdateOlder, RevertNewer, DeleteExtra, UpdateSmaller, UpdateLarger.
- tag( string expression )
- Tags the files in the current panel that match the provided expression. This works just like the Grey + tag function.
- toInt( value )
- Converts value to an integer type. How this is done depends on the type of value which must be a simple type.
A string is parsed and converted to an integer.
A bool will be converted to a 0 or 1.
A timestamp converts to the unix time (seconds since 1/1/1970).
A real is truncated to make an integer.
- toReal( value )
- Converts value to a real type. Just like toInt except that strings can contain a fractional part.
- trim( string str )
- Returns str with all whitespace stripped from the left and right of the string.
- typeOf( value )
- Returns the name of the passed value's type.
- untag( string expression )
- Untags the files in the current panel that match the provided expression. This works just like the Grey - untag function.
- upperCase( string str )
- Returns str with all characters converted to upper case.
- values( map aMap )
- Returns a virtual list containing the values of the map, in their key order.
- view( string fileName[, int offset ] )
- Launches the internal viewer.
User functions
You can define your own functions with the func keyword using the following syntax:
func functionName( [argType] argName{, [argType] argName } ) {
  // Function body
  return returnValue;
}
The function definition can specify zero or more parameters, each with an optional type specifier.
If a parameter has a type specifier and the value provided by the caller is of a different type, the value will be converted if possible,
otherwise an error is reported. The type specifier keywords are bool, int, real, string, timestamp, map & list.
Parameters are passed by reference if possible so if the caller passes a plain variable name as a parameter, the called function can alter that variable's contents,
allowing more than one value to be passed back to the caller.
A function always has a single return value although the return statement is optional.
If no return value is specified, the function returns an undefined value.
A function can have any number of return statements which can be used to return from the function at any point.
EG
func squareAndInc( int x ) {
  square = x * x;
  x++;
  return square;
}

for( c = 1; c <= 5; ) {
  println( squareAndInc( c ) );
}
This script will print the numbers 1,4,9,16,25.
Lambda functions
A Lambda function is an anonymous function which can be passed as a parameter to another function or assigned to a variable.
When executed, it runs in the scope of the function that defined the lambda funciton rather than in a new scope. EG
func forEach( list l, func op ) {
  for ( item : l ) {
    op( item );
  }
}

list1 = [ "The", "quick", "brown", "fox", "jumped", "over", "the", "lazy", "dog" ];
threeLetterWords = 0;

forEach( list1,
  func( string word ) {
    println( "Word is " + word );

    if ( len( word ) == 3 ) {
      threeLetterWords++;
    }
  }
);
println( "There were ", threeLetterWords, " three letter words" );
Other language features
A script can include code from another file using the #include statement which has a single string parameter, the name of the file to be included. EG
#include "myFunctionLib.fcs"
The file will first be looked for relative to the script including it. If not found there, the Script Path will be searched.
This can be configured in the Configuration dialog.
Redirection of standard input and output are supported on the script command line using the standard < and > syntax
allowing reading from and / or writing to files specified on the command line. Redirected input is available in the script
using the predefined variable stdin. This is a virtual list of strings, like that returned by openText().
If standard output is redirected, any text written with print() or println() functions will go to that file instead of the
console.
The predefined variable args is a list of strings containing any command line parameters.
A script can be embedded in a user menu entry using the $script command. All lines in a user menu entry after the $script line
are treated as script lines up until the line that marks the next user menu item or a line containing an $endscript command.
All script lines must be indented at least 1 space so as not to be mistaken for the next user menu item's start line.
The $script line can contain an argument list, including ! operators so you can pass values to the script. EG
F1: List tagged files
	$script !t
	println( args[0] );
	$endscript
	echo Script is done

F2: List tagged files another way
	@script !l
	for ( a : args ) {
	  println( a );
	}
The command line provided by FC/L operates in much the same way as your normal
command prompt with a few extra features. The following keys are used to operate the FC/L
command line:
Command history is used to save you re-typing a command that is the same or
similar to a command you've entered before. It is preserved between sessions in the file
fcl.hst so that closing and restarting FC/L won't lose the
command history. If you use the same command more than once, only the last occurrence will
appear in the history.
There are several ways to locate the command you wish to repeat:
- Ctrl-E or Ctrl-Up
- Recall previously entered command. Repeated use steps
through command history from newest entry to oldest entry.
- Ctrl-X or Ctrl-Down
- Steps forwards through command history. Useful if you
overshoot using Ctrl-E
- Ctrl-J or Ctrl-Enter
- Recall previously entered command that matches
the text to the left of the cursor. Can be used repeatedly to find successive
matches. Note that this function only operates when the character to the left
of the cursor is alphanumeric, otherwise a file name paste occurs as described
in Command Line.
- Shift-Ctrl-J or Shift-Ctrl-Enter
- As above but searches in the reverse direction. Handy if you overshoot the entry you're after.
- Alt-F8
- Displays a window containing a list of previously entered
commands from which you can choose. You can navigate the list using the cursor keys, Page Up/Down, Home, End or the mouse.
You can also:
- F7
- Search for a string in the command list. Note that the search starts at the bottom of the
current page and searches upwards to give a newest to oldest search.
- Shift-F7
- Search again.
- Alt-F7
- Search again backwards.
- Delete
- Remove an entry from history. This is useful if you want to clear incorrect commands or commands containing
sensitive information (EG passwords) from history.
Once you've highlighted the command you want you can press:
- Enter
- Re-execute command now.
- Alt-Enter
- Re-execute command now in a separate session.
- Ctrl-Enter
- Place command on the command line for editing.
FC/L includes a menu system to provide easy access to a range of functions.
Most of the functions on the menu can be activated by short-cut keys which are
listed on the menus. The menu system can be operated by keyboard, mouse or a
combination of both if you like.
Keyboard
- Activate the menu bar by pressing F9 or Ctrl-N. Also, Shift-F10 activates
the menu with the cursor positioned on the last used function.
- Select which menu you want by pressing the first letter of its title or by
using the Left / Right arrows and pressing Enter.
- Use the Up / Down arrows to select the menu item you want and press Enter
to activate it. Alternatively, you can press the key that is highlighted in the
menu item's name.
- You can press Esc to back out.
Mouse
- Activate the menu bar by clicking the right mouse button on the
top line.
- Click on the title of the menu you want to use.
- Click on the menu item you want to activate.
- To dismiss the menu, click anywhere away from the menus.
These should be taken as examples only. The menus operate in much the same
way as GUI menus.
The Left and Right menus contain exactly the same functions but apply them
to the appropriate panel.
- Brief
- Set panel to view files in Brief mode.
- Full
- Set panel to view files in Full mode.
- Wide
- Set panel to view files in Wide mode.
- Brief-Wide
- Set panel to view files in Brief-Wide mode.
- Unix detail
- Set panel to view files in Unix detail mode.
- Info
- Set panel to show drive summary information.
- Tree
- Set panel to view directories as a
Tree.
- On/Off
- Toggle the visibility of the panel. Turning a panel off allows you to see
the output of previously executed commands.
- Name
- Sort panel by file name
- Extension
- Sort panel by file name extension. The extension of a file name is from the
last '.' onwards. Files with the same extension are ordered by name.
- Time
- Sort panel by file modification time and date. Files are listed from newest
to oldest.
- Size
- Sort panel by file size. Files are listed from largest to smallest. Files
of the same size are ordered by name.
- Unsorted
- Files are listed in the order provided by the file system.
- Reverse
- Reverses the order in which files are listed.
- Re-Read
- Refresh the contents of the panel. Useful if another process has modified
the contents of the panel's directory or if removable media has been changed.
- Filter
- Display a dialog that allows you to modify the file name
Filter
- Drive
- Change the drive being viewed. A small dialog is displayed showing the
currently available drives from which you can choose.
The file name filter can be used to define which files you want to see and
which files you don't. It is specified by a
boolean expression. If you want all files to show
the filter should be set to just a single * (which is the default value).
This field has a history recall
facility.
EG
- *.{exe,com,cmd,bat}
- Show only executable files
- !*.obj
- Show all files except object files.
- !*.obj | foo*
- Show all files except object files unless they start with foo.
If the value for the filter is anything other than * the panel's heading
will show the current directory's path with a trailing \? to remind you that
a filter is in effect.
- Manual
- View User Manual.
- User Menu
- Display the
User Menu.
- View
- View the current file.
- Edit
- Edit the current file.
- Copy
- Copy Files.
- Rename or Move
- Move Files.
- Make Directory
- Create a Directory.
- Delete
- Delete Files.
- File Attributes
- Display a dialog to alter
File Attributes.
- File Case
- Modify a file or group of tagged files' names to be upper, lower or mixed
case. This is only useful on case preserving file systems.
- File Date/Time
- Modify a file or group of tagged files' date stamp (last modified date).
- File Information
- Show the File Information dialog containing detailed file meta-data.
- Select Group
- Tag
a group of files by file name mask.
- Unselect Group
- Untag
a group of files by file name mask.
- Invert Selection
- Toggle the Tagging status of all
files in the current panel.
- Restore Selection
- Restore tagging status to the way it was before the last copy operation.
- Quit
- Exit File Commander/L.
The File Attributes dialog allows you to modify the unix permissions, owner and group
of a file or a group of files. To activate it select it from the Files Menu
or press Ctrl-A.
If no files are tagged, you'll be presented with a dialog displaying the
attributes of the currently highlighted file. You can use the Up / Down arrow
to move the cursor and Space to toggle the attribute the cursor is on or you
can click on the check boxes with the mouse.
If you have any files tagged, you'll be presented with a slightly different
dialog. For each attribute, you can set, clear or leave alone that attribute
for all the tagged files. The dialog looks similar to the one used for a single
file but the check boxes are 3 state instead of 2. The three states are:
- [z]
- Don't change attribute (default)
- [ ]
- Reset attribute
- [X]
- Set attribute
A number of hot keys are available to make using the dialog more efficient.
- 0-7
- Set the current permission group to the octal value of the key pressed and
advance to the next group. This makes it easy to set all permissions for a file
with just a few key strokes if you're familiar with the standard mapping of octal
values to unix file permissions.
- R,W,X,S
- Toggle the Read, Write, Execute, and SetUID/Sticky check box for the current
permission group. Use Shift to toggle the attribute for all groups.
The User and Group fields can be used to change these attributes of the file.
When files are tagged, these can be left empty to indicate no change to the user
or group attributes of the files.
When you've set all the check boxes the way you want them, press Enter (or
click OK) to proceed or ESC (or click Cancel) to exit without changing
anything.
- Tree
- Pop up the Change Directory Tree.
- File Find
- Locate a file using File Find dialog.
- History
- View the Command Line History.
- EGA Lines
- Toggle 50 line mode.
- Directory History
- Activate Directory History dialog.
- Swap Panels
- Swaps the positions of the left and right panels.
- Panels On/Off
- Removes or replaces the panels allowing you to view the output of
previously executed programs.
- Compare Directories
- Tags files according to the differences between the two panels. See
Compare Directories for details.
- Calculate Dir Size
- Totals the size of all the files the currently highlighted diretory or
currently tagged directories and displays the result(s) on the file panel in
the field that normally says '>SUBDIR<'
- Open Gnome Window
- Causes Gnome
to open a window corresponding to the directory that FC/L is currently displaying.
- Edit Associations
- Starts the internal editor on your fcl.ini file. Any changes you make to
associations will become active immediately.
- Edit User Menu
- Starts the internal editor on your main fcl.mnu file.
- Configuration
- Display the Configuration dialog
allowing you to alter a number of options.
- Colours
- Edit the Colour Scheme used by FC/L.
- Confirmations
- Display a dialog that allows you to disable some of the
Confirmations.
- Hidden Files
- Toggles whether files with their hidden attribute set will be shown on
the file panels or not. When hidden files are displayed, they are denoted by
a '0' character.
- Path Prompt
- Toggles the display of the current path on FC/L's command line prompt.
- Full Screen
- Toggles whether the panels occupy the full screen length or just half the
screen.
- Clock
- Toggles whether a clock will be shown in the top right hand corner or not.
- Tag Directories
- Enables the mass tagging commands to tag directories also. See
Tagging Files for more details.
- Thousand Separator
- Toggles the use of a thousand separator in the file size column of
Full and Wide modes. This reduces the number of
significant digits that can be displayed but can increase readability.
- Retain Dir Count
- When set, the results of a Ctrl-Q Directory Size Count are retained when
changing directory. This makes it easier to track down directories that are hogging a lot
of disk space.
Note that the directory sizes displayed are only as up to date as the last count.
- Save Setup
- Saves all current settings to the file fcl.ini so that all FC/L options
will be set the same the next time you start it up. This can be performed
automatically on exit if you wish by setting the autosave option (See
Configuration).
To view the configuration options, select 'Configuration' from the Options
Menu. Any options you change take effect
as soon as you click OK (or press Enter when OK is the default button). If you
use Cancel, all changes you've made are forgotten.
To select an option to change either click on it with the mouse or use the
TAB, Shift-TAB, Up & Down arrow keys to move to it. The current option is
indicated buy a flashing cursor.
If you want the changes to still be in effect the next time you start FC/L
you need to select 'Save Setup' from the Options
Menu otherwise the changes will be lost when
you exit. Alternatively, you can switch on 'Autosave Setup' seen below.
The options are:
- Viewer
- The file name (with full path if not in a directory on your PATH) of the
file viewer to be used when you press F3. All the '!' substitutions described in
Associations can be used when
specifying a viewer or an editor. If this field is left blank, the
Internal Viewer will be used.
- Alternate Viewer
- As for Viewer but specifies the viewer used when Alt-F3 is
pressed.
- Editor
- Similar to Viewer but specifies the editor used when F4 is
pressed. If left empty, the
Internal Editor will be used.
- Alternate Editor
- As for Editor but specifies the editor used when Alt-F4 is
pressed.
- Left Startup Directory
- The directory the left panel will display on start up. If left blank,
the current directory for the session will be shown. This can be overridden
by a /l dirname command line parameter.
- Right Startup Directory
- The directory the right panel will display on start up. If left blank,
the current directory for the session will be shown. This can be overridden
by a /r dirname command line parameter.
- Separate Session Prefix
- String added at the start of a command that causes it to be executed in
a separate session. Default value is gnome-terminal -x ! &.
- Tree Data Directory
- The directory where tree data is stored. If left blank, tree data will be
written to the .fcl directory in $HOME as "fctree.dat".
The data stored is a representation of the directory structure of a drive and
is used to avoid re-scanning the drive.
- Case Filter File Systems
- A list of file system names (as displayed on the Info panel) that are not
case preserving and so need file names to be converted to lower case for
easier reading. If not listed here, file names will be displayed as provided
by the file system.
- Path Extension
- A list of directories, separated by colons, that are to be searched for executables
in addition to those specified in the PATH environment variable.
- Script Path
- A list of directories, separated by colons, that are to be searched when a File Commander Script uses
a #include directive.
- Auto Save
- Switching Autosave on causes FC/L to automatically perform a
'Save Setup' just before exiting the program.
- Use X Clipboard
- When on, FC/L's internal editor will use
the system clipboard when performing
Copy/Cut/Paste operations allowing it to share clipboard data with other
programs. When this option is turned off, FC/L uses its private
clipboard which operates somewhat faster.
- ESC Panel Switch
- Enables the use of ESC as a quick key for switching panels off/on when
the command line is empty.
- Size Count Pause
- If enabled, FC/L will pause at the end of a directory size count activated
by Ctrl-Q, allowing you to view the total file and directory counts. Pressing
any key dismisses the dialog.
- Lines
- Sets the number of lines on screen or in window. Can be any number
supported by your video card for full screen sessions or any value of at least
25 for a windowed session. Using a number that is not supported by your card
in a full screen session will result in the number of lines being set to the
next possible value up.
- Scroll Delay
- The time (in milliseconds) that FC/L waits between scrolling each line when
the mouse has been used to scroll a panel or window. Use of this option stops the text
flying past before you've had a chance to see what it is.
- Time Mode
- The type of time display used on the clock and when file time stamps are
viewed in the files panel (Full mode).
The Colours dialog allows you to alter the colour scheme used by FC/L. To
activate it, select 'Colours' from the Options
Menu
You will be presented with a list of items in the colour scheme. Use the
up & down arrow keys to move to the item you wish to change and then use F to cycle
through forground colours and to cycle through background colours. Holding
SHIFT at the same time will cycle backwards. There are a total of 16 colours to
choose from for both foreground & background.
When you're done, choose OK to use the changes you've made or ESC to forget
them. Note that the changes will only be remembered for next time if you
use 'Save Setup' or have Autosave enabled.
Before doing anything significantly destructive, FC/L will ask for
confirmation from the user to prevent accidental loss of data. If you are
confident in your use of FC/L and don't want to be asked for confirmation all
the time, you can disable some of the more common confirmation prompts by
selecting 'Confirmations' from the Options
Menu.
A dialog displaying a list of confirmation types is then displayed with a
check box next to each one. An 'X' in a check box indicates that the
confirmation is enabled. To disable a confirmation, click its check
box with the mouse and click OK. The keyboard can also be used (Up / Down
arrows and Space, Enter when done).
The confirmations you can alter are:
- Delete File/Empty Directory
- The first prompt you see after pressing F8.
- Delete Tagged Files
- The second prompt you see after pressing F8 when there are files tagged.
- Delete Non-empty Directory
- The prompt that asks you to type "YES" before doing a tree delete.
- Quit FC/L
- The prompt shown when you press F10. With this disabled, F10 causes
immediate exit.
- "YES" prompt for Non-Empty Directory
- Similar to Delete Non-empty Directory but instead of disabling
the "YES" prompt altogether, it is replaced by an OK / Cancel / All choice, the
default being Cancel so anyone blindly pressing ENTER won't get caught.
FC/L allows you to view the current file with a choice of two standard viewers or to
edit the current file with a choice of two standard editors. You can also configure any number of
specialized viewers and editors via associations. To view a file, use F3 or
Alt-F3. To edit a file, use F4 or Alt-F4.
You can also use Shift-F3/F4 instead of Alt-F3/F4 if your window manager traps these.
When you press F3 or F4, FC/L will look for an association that matches the current file
and if it finds one it will use the program given. If there's no matching association the standard program
will be used. The standard programs are specified in the
Configuration dialog. If these are left empty, the
built in Viewer and the built in
Editor are used for F3 and F4 respectively.
View and Edit associations are specified in the same way as execute
associations but are added in fcl.ini under
section headings [Viewer Associations] and [Editor Associations]. These headings will be created
automatically when you first use Save Setup.
If you wish to specify the file to view or edit by typing its file name, use
Shift-F3 for view or Shift-F4 for edit. If you specify a file to edit that
does not exist, you will be given the option to create it.
The viewer or editor can be invoked directly when starting FC/L using the
command line switches -v or -e followed by the name of the file to be viewed
or edited. This allows other programs to call FC/L to view or edit files for
them.
The file viewer built into FC/L is a basic text viewer that is ideal
for taking a quick look at your text files. You can use the mouse or keyboard
to scroll the text up and down (Keys: Cursor-Up/Down, Page Up/Down, Home,
End).
To scroll the text using the mouse, click the mouse in the top or bottom
thirds of the screen. Using the right mouse button pages up or down.
When the mouse is being used to scroll the text, the speed of scrolling
is determined by the Scroll Delay
Configuration directive.
If a line is longer than the width of the viewer it will be chopped off at that length and
the remainder placed one the next line unless you use F2 to select Unwrap mode.
With the text unwrapped, you can use the Left / Right arrows to scroll the text
horizontally. Ctrl-Left/Right scrolls in a much larger step (40 columns). Also,
the mouse can be used to scroll horizontally by clicking the mouse in the
centre third of the screen on the left or right side. ie
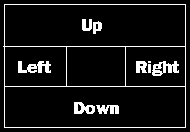
The built in editor is a simple text editor that allows you to make
quick changes to any plain text file.
-
Like the viewer, the editor will read a file using any type of line terminator.
The file will normally be written back using the same type of line terminator
unless overridden by the Alt-U command listed below.
-
Although there is no limit on the size of file you can edit, keep in mind that
the whole file is loaded into memory so opening a multi-megabyte file may
blow out your swap file. If you do this accidentally you can abort loading a file by pressing ESC.
-
The editor uses the system clipboard allowing you to exchange text with other
programs. This feature may be turned off using the Use X clipboard setting in the
Configuration
-
If the file has been viewed or edited before, FC/L will return you to the same edit
position.
-
Will not expand TABs to spaces so it is safe to edit makefiles that require TAB
characters. EG GNU Make
-
When loading the file, FC/L will automatically determine the text file's encoding
(codepage, UTF-8, UTF-16 etc) but the encoding type used to interpret the existing file's data
can be overridden using the Alt-E function. In addition, the encoding used to save the text
can be chosen with the F3 - Save As dialog. This allows either a file to be converted to a
different encoding or for the encoding of a new file to be set.
The following keys operate in the editor:
- Left/Right/Up/Down
- As you'd expect.
- Backspace
- Delete character left of the cursor.
- Ctrl-Backspace
- Delete word left of the cursor.
- Alt-Backspace
- Undo.
- Alt-Shift-Backspace
- Redo.
- Delete
- Delete character under the cursor or, if any text is selected, deletes selected text.
- Ctrl-Delete
- Delete the word to the right of the cursor or, if some text is selected, deletes selected text.
- Home
- Go to the start of the line.
- End
- Go to the end of the line.
- Page Up/Down
- Up/Down one page.
- Ctrl-Home
- Top of screen.
- Ctrl-End
- Bottom of screen.
- Ctrl-Page Up/Down
- Start/End of file.
- Alt-[ / Alt-M
- Jump to matching bracket. Recognizes round, curly, square and angle brackets.
- Ctrl-Y
- Erase line.
- Ctrl-Space
- Copy a single character from the line above.
- Ctrl-Alt-Space
- Copy the remainder of the line above.
- Ctrl-Insert / Ctrl-C
- Copy selected text to clipboard.
- Shift-Ctrl-Insert / Shift-Ctrl-C
- Append selected text to clipboard.
- Shift-Insert / Ctrl-V
- Paste from clipboard.
- Shift-Delete / Ctrl-X
- Cut selected text and place on the clipboard.
- Ctrl-W
- Copy the word the cursor is currently on to the clipboard.
- Ctrl-Shift-U/L/M
- Change case of selection to upper/lower/mixed.
- Alt-Left/Right
- (Un)indent block.
- ESC or F10
- Exit editor (prompts to save if changes made).
- Shift-F10
- Save and exit.
- F2
- Save now without exiting.
- F3
- Save now with prompt to change file name.
- F7
- Search for a word in the text. Case sensitivity is optional as is the direction of the search.
A Whole Word option is also available.
The text field has a history recall
facility to save retyping recently used values.
- Shift-F7
- Search for the same word again.
- Alt-F7
- Search for the same word again in the opposite direction to that selected when F7 was used.
- F8
- Search and Replace. Similar to the search function (F7) but allows a replacement string
to be specified. When a match is found you are given the choice of replacing, skipping, cancelling
or replacing all matches.
- Alt-Comma
- Jump to the previous occurance of the word the cursor is on.
- Alt-Dot
- Jump to the next occurance of the word the cursor is on.
- Ctrl-Q
- Quote next character. This enables you to enter control character
into the file that would normally be rejected. For example, pressing Ctrl-Q ESC
would insert the ESC character into the text.
- Insert
- Toggle Insert/Overstrike mode. When in overstrike mode the cursor becomes
a block instead of an underline.
- Alt-[1-8]
- Change TAB size to that of the number pressed.
- Alt-C
- Sets one or more file code pages to use as the text code page.
More than one value can be specified, separated by commas, and Alt-T will switch between them.
- Alt-E
- Select the encoding type of the loaded file. Note that this option changes the way the existing
file data is interpreted so requires reloading the file from disk. If you've made any changes to the
text, they will be discarded after a confirmation. If you only want to change the encoding used to save
the text, use the F2-Save As function instead.
- Alt-H
- Toggle Syntax Highlighting (on by default for supported file types).
- Alt-I
- Toggle Auto Indent mode. When this mode is on (indicated by an 'I' on the
status line) Pressing ENTER will start a new line with the same indentation
as the line above. This is most useful when editing program source files.
- Alt-L
- Used to jump to a given line number.
- Alt-T
- Alt-T Switches the file code page between the values specified via Alt-C and the standard code page.
- Alt-U
- Toggle type line terminators. When this mode is on (indicated by a 'U'
on the status line), saving the file will cause it to be written using a LF
as the line termiator instead of the usual CR/LF pair. This can be used to
convert a text file between PC and text formats. When the editor is
started, this mode will automatically turn on if the file being opened only
contains LF terminated lines.
- Bookmarks
- The bookmark functions allow you to store & recall up to 10 positions within a file.
The keys used are the same as for Stored paths in the file panels
(Shift-Ctrl-Numpad-[0-9] to store, Ctrl-Numpad-[0-9] to recall). The positions are remembered between edits of the
file but are lost when FC/L is closed.
To select text, hold down Shift and use the above cursor movement keys to
move over the text you want to select. You can also drag the mouse over the
text. The mouse can also be used to perform a page up or down by clicking the right mouse button
in the top or bottom third of the screen.
The states of the Insert/Overwrite, Auto Indent, Tab Size and Code Page settings are retained between
edits and will be saved in fcl.ini if Save Setup is used.
The FC/L Internal Editor supports customisable syntax highlighting. The syntax definitions
are in the file fclsyntax.ini which is included in the distribution ZIP file. You can use this
file as is or customise it to suit your own preferences.
The standard fclsyntax.ini is installed as /usr/share/filecommander/fclsyntax.ini which may be copied to your
~/.fcl directory and customised there. FC/L looks for a fclsyntax.ini in ~/.fcl before using
the standard one.
If you want to keep your syntax definitions in multiple files you can use the !include directive to bring
in the contents of another file.
It consists of a number of sections. The first section starts with [Colour Classes] and defines a mapping
between a syntactic meaning and an actual colour. It enables a consistent colour scheme for multiple languages
without having to repeat the same literal colour names in each language definition.
There is then a section for each supported language. The section heading is in the format
[language Name : filename filter]
and is followed by a number of syntax definition commands. The suported commands are:
- words[/i] : colour : word list
- Defines a list of words that are to be coloured colour. If the /i is included, the words will be compared
case-insensitively. Each word in the list is separated by a space. Multiple lines can be used to specify the word list
by ending each line but the last with a line continuation indicator, a backslash. Mulitple sets of words may be defined
by using multiple words statements and each may use a different colour.
- wordchars : character list
- Allows additional characters to be considered part of a word. By default, all letters and numbers are considered
to be word characters. Use wordchars to add characters that the language allows to be part of symbol names.
EG in C/C++, underscore is allowed in symbol names.
- symbols : colour : symbol list
- Defines a list of symbols that are to appear in the specified colour. These will typically be symbols that are
significant in the language being defined.
- linecomment : colour : marker
- Defines a string that indicates the start of a comment that will last until the end of the line.
- blockcomment : colour : start marker : end marker
- Defines the format of a comment block that starts with start marker and ends with end marker and may span multiple lines.
- string : colour : open character : close character
- Defines the format for a literal string. Between the open character and close character all characters will be coloured colour
and the usual syntax highlighting will not occur.
- number : colour
- Defines the colour of any word that begins with a digit.
- escape : escape character
- Defines the character that, if used in a literal string immediately before a string close character, will cause that character to
be treated as part of the literal string rather than closing the string. The escape command will only affect string commands that
follow it.
- state[/ilw] : colour : state name : start marker : end marker
- Defines a custom state (see below). While in this state, all text will be coloured colour.
start marker and end marker define the strings that begin and end this state.
The options that can be specified after a / are:
- /i: case insensitive matching against the start and end markers.
- /l: the state ends at the end of the line.
- /w: the state ends when whitespace is encountered.
- statechange[/i] : colour : marker : push|pop|swap : new_state
- Defines a transition between states. This allows more flexibility than the state command alone. new_state must be defined
by a state command though its start and end markers may be empty if statechange commands are used to change to & from
that state.
States
In some languages it is necessary to use multiple states to correctly highlight the text.
For example, in HTML the word table should be highlighted as a keyword when inside a tag but not when in regular
text between tags. By default, the highlighter has a few predefined states: normal, string, linecomment, blockcomment.
All of the commands above will only act when the current state is normal. This can be changed by specifying the required
state immediately after the command in brackets. EG
state : tagcolour : tag : < : >
words(tag)/i : keyword : html title head body table
More than one state can be specified as a comma separated list. In that case, the command will operate in any of the listed
states. The normal state is specified as an empty string.
The user menu is a list of functions defined by you to help you carry out
common tasks. It is activated by pressing F2 and then using the Up/Down arrows
and Home/End to choose an item and Enter to select or ESC to cancel.
The mouse or the entry's hot key may also be used to select a user menu choice.
To create a user menu you need to create a plain text file
(using an editor like FC/L's internal editor)
named fcl.mnu containing your list of menu functions
in the ~/.fcl directory.
This can be done most easily by selecting Edit User Menu from the Commands menu.
Here is an example user menu file:
E: Editor
	gedit

F: Firefox
	firefox

Z:Zip tagged files
        zip -r !i"Name of Zip?" -@ < !@

U: Unzip to opposite panel
        cd !P
        unzip !f
        cd !p
A line that starts in the first column is a description line. The key
used to activate the function is first and may be any single letter or
number or one of the function keys F1-F12. Function keys may be prefixed with
S, C or A to indicate Shift, Ctrl or Alt.
After a separating colon comes the description that will appear in the menu
when it is displayed.
Any line that starts with a space or tab is a command and will be executed
when the preceding description is chosen from the menu. It may contain the same
'!' substitutions as Associations
with the addition of the following:
- !t
- Substitutes for the name of a file and causes the command to be executed
once for each tagged file. If no files are tagged, !t is just like !.
May be followed by an x to give the name without its extenstion, or by an f
to give the full path.
- !l
- Substitutes for a list of all tagged files, space separated. The command
line length will not be allowed to grow beyond 1000 characters so if many
files are tagged, some might not make it. If this happens, the files that
were not included remain tagged after the command is executed. Can be followed
by an 'f', IE !lf, to use full paths for the file list.
- !L
- Same as above but for the opposite panel.
- !@
- Substitutes for the name of a temporary file that contains a list of tagged files,
one per line. Can be followed by an 'f' if full paths are required.
- !i"Question"
- Substitutes for a value input from the user. This causes a small dialog to
appear displaying the supplied question and an input field. If ESC is pressed
during input the user menu command is terminated. If a !i appears on the same
line as a !t, the question is asked only once even though the command may be
executed multiple times.
A submenu can be created by following the key:label line with a set of
commands enclosed in curly brackets. The curly brackets must be in
column 1. EG
S: SubMenu
{
1: Sub-option 1
        Command1

2: Sub-option 2
        Command2
}
Menu entries from another file can be included using the !include directive. This allows
you to break large complex menus into multiple files for easier management. It also lets you share
menu items between multiple local menus (see below) or to include the main menu in a local menu.
Local User Menus
In addition to the main user menu, you may create additional special purpose
user menus by creating an fcl.mnu file in directories other than the one
containing the main fcl.mnu. When you press F2 to activate the user menu, FC/L first
looks in the current directory for a local user menu and displays it if found.
If no fcl.mnu is found in the current directory, all parent directories will
be checked for a local menu until one is found or the root is reached. If no local menu file is
found the main user menu is displayed.
You can force the main user menu to show by pressing Shift-F2 instead of F2.
File Commander/L provides support for archive files (ZIP, ARJ, LZH, RAR, ACE, HA, GZIP, TAR, 7ZIP and BZIP2 types are
currently supported) that makes these files behave in a similar way to normal subdirectories.
To view the contents of an archive you simply press ENTER when the cursor is located on the
archive file. It's possible to navigate any subdirectories inside the archive just as you
would a normal directory tree.
When a panel is showing the contents of an archive its top line, showing the current path,
changes colour so you won't forget that you're not looking at a real subdirectory. While the
majority of functions are available inside an archive, some restrictions do apply.
- Copying files into an archive may only be done when the destination is the root directory
of the archive.
- It's not possible to change the name of a file while copying it from an archive.
- Making a directory (F7) is not supported.
- Changing Date/Time, Attributes or File Case is not supported.
- Making an object isn't supported (wouldn't make any sense anyway)
- File Find isn't able to search into archives (this may change in later versions).
- Directories don't show up on the tree.
- Open Gnome window obviously can't work.
After reading all that you may be wondering what does work. The answer (as far
as I'm aware) is everything else. This includes, but is not limited to:
- copy/move files out of archive (extracting) even from subdirs in archive.
- copy/move files into archive (compress) but only into archive's root.
- View file in archive.
- Edit file in archive.
- Delete files from inside archive.
- Enter another archive (that is an archive inside an archive).
- Ctrl-Q on directory inside archive.
- If you use a ! on the command line or in a user menu function, FC/L automatically extracts
the current file into a temporary directory and substitutes the full path of the temporary
file for the '!'.
- If you press ENTER on a file that is an executable or is associated with a program, it will
be extracted temporarily to allow it to be used. Only the one file is extracted though so
if other files in the archive are required (EG DLLs) then it won't work as you intend.
- Self-extracting archives can be entered by using Ctrl-PageDown. As the file is an
executable, FC/L's normal reaction is to run it if you press ENTER.
You can configure the way FC/L calls archiver programs in fcl.ini
under the section headings [Archiver:xxx] where xxx is the archive type. The following
settings are provided:
- Compress
- Command used to add files to an archiver or create a new archive.
- CompressListfileSwitch
- If the archiver given in Compress supports a list file as input, this is the prefix used to specify that the
following name is a list file.
- Extract
- Command used to extract files/directories when using F5 or F6.
- ExtractListfileSwitch
- Same as CompressListfileSwitch but for Extract command.
- Delete
- Command used to delete files/directories with F8-Delete
- CompressDirSpec
- Configures the way directories are given to the compressing archive program so that the archiver will include a whole directory
tree. A ! character represents the directory name. Most archivers require a suffix of \*.
- ExtractDirSpec
- As above but for extracting from an archive.
You can use the mouse to perform the following operations:
-
Select a file by clicking button 1 on a file name.
-
Tag/Untag a file by clicking button 2 on it.
-
Execute a file or change into a directory by double clicking button 1 on it.
-
Scroll the files up or down by clicking button 1 on the line directly above
or below the files.
-
Tag several files by holding down button 2 and moving the mouse. If, while
button 2 is pressed, the mouse is moved onto the line above or below the
file list, the panel will scroll, tagging all files that pass by.
-
Select a function to perform by clicking on the function bar at the bottom
of the screen. Using button 2 Selects the Alt function.
If a Ctrl, Alt or Shift key is pressed
when button 1 is clicked on the function bar, the function called is modified
appropriately.
-
Activate the menu by clicking button 2 on the top line of the screen. The
easiest way to make a selection is to hold button 2 down after activating
the menu, "pull down" the menu you want and release button 2 when you have the
correct item highlighted. Clicking outside the menu area will dismiss the
menu.
-
Whenever a dialog popup appears that contains push buttons that look like
"[ OK ]", you may click on these with mouse button 1 to select the
indicated choice. Clicking button 2 will select the highlighted button.
-
Whenever a dialog popup appears that requests a string input (eg Make
Directory), button 1 may be used to position the cursor on the line and
button 2 is equivalent to pressing ENTER. Clicking button 1 outside the dialog
box or on a Cancel button, cancels the operation.
-
When the results of a 'File Find' operation are showing, double clicking
button 1 on a file name will cause FC/L to jump to the directory the file
is in (like pressing ENTER). The window can be scrolled by clicking on the
top or bottom lines of the window.
- When using the internal file viewer, clicking button 1 in the top or
bottom third of the screen scrolls the screen up/down. Using button 2 pages
up or down.
- When using the internal editor, the mouse may be used to position the
cursor on the currently displayed page or dragged over a section of text to
mark it for Cut/Copy/Paste operations.
- To associate Firefox or Lynx with HTML files, the command syntax looks like
*.{htm,html}: firefox file://!f
-
If you attach 4DOS/4OS2 descriptions to your files, they will be preserved if
you copy or move them using FC/L.
-
If you want your viewer or editor to run in a separate session, add an & symbol
and the end of the command.
The following miscellaneous options can only be changed by directly editing
your fcl.ini file. Note that it's possible to use multiple INI files by specifying the name
of an alternate INI file as a parameter to fcl. If the specified file doesn't yet exist, the
default INI file will be loaded but the specified file will be written when settings are saved.
Running fcl -h displays all command line parameters.
- BriefWordRight [ON|Off]
- The behaviour of all 'word right' movement is altered by this option. If
this option is on (which is the default) the cursor will move to the end of the
current word or, if it is already at the end of a word, to the end of the next
word. When off, the cursor will always move to the beginning of the next word.
- CmdChar
- This is the character that is interpreted as FC/L's command character for
the substitutions listed in
Associations and
User Menu. As these substitutions are also
applied to commands entered on the command line, changing this options may be
useful if you have a lot of files with a ! in their name.
Default is !
- CodePage
- Sets the codepage that FC/L will use. A value of 0 (the default) means use
the current codepage.
- DisableInvert [On|OFF]
- Disables the Invert Selection function of the Grey * key, allowing it to resume its normal
function of typing a *. This is provided for people who's keyboards make it a chore to get the
other * (Shift-8 on a normal US keyboard). The Invert Selection function can still be used by
selecting it from the Files menu.
- IndentWidth
- Sets indent size of the editor's block indent function. Default is 1.
- KeepExtVisible
- When a file name is too long to fit in the panel's column, keep the extension visible when truncating
the file name to fit. Default is ON.
- MaxHist
- The number of command history entries to keep. Default is 500.
- Shadows [ON|Off]
- Enables window shadows. Default is ON.
- StickyAlt [ON|Off]
- Affects the behavior of file name seeking using Alt-[letter] combinations.
If this option is off you need to keep the ALT key held down for the whole
seek string. This has the advantage of allowing you to start typing a command
as soon as ALT is released.
- TextCodePage
- Overrides the default code page used for text files. If this is 0 (its default value)
then the default code page for text files will be
819, also known as ISO-8859-1.
File Commander has the ability to run remotely, where an instance on the local machine
runs an instance on a remote machine via an SSH link and provides the user interface for the remote
instance. This allows you to administer a remote machine as if you were sitting in front of that
remote machine and running FC/L. This is functionally similar to using a remote
shell to run a console based file manager.
This facility is best suited to administering remote Unix-like operating systems that commonly
have an SSH server running. However, it is possible to use with a remote server running Windows
or OS/2 if suitable SSH server software is installed. I've successfully tested a Windows remote
using Bitvise WinSSHD.
The protocol used to communicate between the local and remote instances of File Commander
is OS independent so any local OS can connect to any remote OS. This protocol consists of high
level console API commands so is much more efficient than a graphical remote desktop protocol
like RDP or VNC.
To set it up you need to have the following in place:
- The remote system must be running an SSH service.
- The local system must have an SSH client that can successfully connect to the remote machine.
- The remote system must have a suitable fc-remote executable installed somewhere in the user's executable search path.
To start a remote session, run FC/L with a -h hostname switch. The hostname is passed verbatim
to the ssh client that FC/L uses to establish the connection to the remote server so can include a user name
in the form user@hostname.com.
If you have any comments, questions, suggestions or bug reports, please feel
free to contact me by any of the following means:
- Email
- brian.havard@gmail.com
- Web
- http://silk.apana.org.au/fc.html
Users of PGP public key encryption may wish to use my
PGP Public key
First release of Win32 version. The version number is started at 1.51 to stay in alignment with the
OS/2 version.
New Features
- Editor: Undo function
- Editor: Bracket Match
- Editor: Indent/Unindent block function using Alt-Left/Right arrows.
- Associations for view and edit, allows automatic selection of specialized viewer/editor programs.
- For the supported archive types, the Archiver programs and command line options to them are now configurable in the INI file.
- Code page translation function in Viewer and Editor. Translates from a given code page to the current display code page.
- Panel filter supports boolean expressions instead of old, rather obscure syntax.
- Boolean expressions extended to support %size, %date, %age, %attrib operators.
- Viewer and Editor can have their TAB width set to any value from 1 to 8.
- Label edit using Alt-L on Info panel.
- Persistent command history.
- Physical free memory on Info panel.
- File Find made multithreaded, allowing view/edit/browse during search.
- Shift-F5/6. Like F5/F6 but default new name never includes the path of the opposite panel.
- Added Ctrl-Shift-\ to set current directory to that of other panel.
- Once File Find has completed a search, results may be sorted by pressing Ctrl-[F3..F6]
- Duplicate elimination in command history, only most recent copy is retained.
- Text search in command history window, like F7 in view/edit.
- Drop down history list added to key text entry fields, activated by Alt-DownArrow or mouse clickable arrow.
- The mass tagging keys (Grey +,-,* etc) will act with the Tag directories option reversed if Shift is also pressed.
- Whole word option added to string searches in internal viewer, editor and File Find contents search.
- Support for ACE archiver.
Minor Enhancements
- Update tree size data with size of total files in current directory so that when 'Retained Dir Count' is on the sizes stay more up to date.
- In Alt-F5 stored paths dialog, Insert sets an entry to the current panel's path.
- In Alt-F5 stored paths dialog, Delete can now clear an entry.
- Panel heading indicates when a panel filter is active.
- When calling view/edit from file find, propagate Case Sensitive setting.
- Drive label display in change drive dialog.
- Changes session title to reflect program being executed.
- When editing a file with read-only attribute set, now offers option to override RO on save.
- Workarounds added for problems copying to NFS drives.
- User menu is now scrollable.
- File Find now indicates search is complete by replacing the "Searching" flashing indicator with "Search Complete" or "Search Stopped" if search was interrupted, followed by the count and total size of files found.
- Ctrl-Minus now restores cursor position as well as directory.
- Local user menus are now active in all subdirectories of the menu's directory.
- Viewer can now handle viewing files that are growing.
- In viewer hex mode, left/right arrow moves back/forward one byte.
- Ctrl-J now quotes names starting with a '-'.
- Optimized text search code used in View and File Find's "Containting" search to be at least twice as fast (more like 6-10 times, depending on search string, if file is fully cached).
any .LONGNAME EA will be removed. This prevents incorrect display in WPS windows.
'
- RAR SFX files can now be entered.
- Quick keys for Brief/Full/Wide view change, Alt-Shift-F1/2/3
Bug Fixes
- When running a program via an association and one panel is off, the key bar would get scrolled up screen.
- Editor: Using Alt-L and entering 0 as line number crashed FC.
- Command lines longer than 200 characters would crash history list.
- If both panels view archives containing the same file name, viewing both would clash names in %TMP
- It wasn't possible to change a file's time to 0:00
- If "Full screen" option was changed while panels were off, panels were corrupt when turned back on.
- Tree wasn't sorted until fc2tree.dat first written.
- Fix for problem deleting read-only files from Netware drives.
- Ctrl-Right in editor doesn't behave as expected at the end of a line.
- Pressing enter on a CMD file that has spaces in its name fails.
- Trying to use Attribute modify on a tree view panel failed.
- Weird behaviour in user menus if .mnu ends in Ctrl-Z fixed.
- Entering a string in the 'Containing' field of 'File Find' longer than 100 characters caused trap.
- Editor: A 'shift tap' followed by a backspace or delete didn't work.
- Volumes with labels longer than 20 characters would crash FC.
- If subdirectories were more than 32 deep, tree view would crash.
Bug Fixes
- External command output wasn't always in the colour specified in FC's configuration.
- The 4DOS descript.ion file could get multiple entries for the one file when overwriting files with the 'All' option.
- When copying / moving whole directories, 4DOS descriptions were being lost.
- Editor: Undoing the removal of marked text from the very last line of the file would give an incorrect result.
- Editor: Undoing removal of translated characters would mangle text.
- The 'smart CD' function was broken in that it searched the tree case sensitively.
- Fixed memory leak in paste function.
New Features
- Colourization of file names by boolean expression.
- Redo in editor to go with undo.
- Command line switches to override starting directory for left or right panel.
- Directory history for changing back to recently viewed directories.
- Support for archives inside archives.
- Editing of files inside archives.
Minor Enhancements
- Shift-Alt-F9 toggles 132 column mode.
Bug Fixes
- Certain corrupt RAR files could cause FC to get stuck in an infinite loop.
- In viewer, search match highlight was wrong if not using 8 size tabs and there are tabs on the line before match and the line is wrapped.
- Editor doesn't report failure to save to a write protected disk.
- Changing to a drive on which the last directory accessed no longer exists would cause a read error, making FC unable to change to that drive.
- If CaseFilter option is active for a drive, directories should be forced to upper case.
- Fixed ARJ support to work with files created by ARJ v2.62.
Bug Fixes
- If an INI file was specified on the command line without a path, INI files would get saved to whatever directory FC was showing.
- Editor: Undo wasn't setting the changed flag.
- Fix race condition that would sometimes cause failure to enter archives on some drive types (esp network).
- After toggling the hidden files option with the left panel active and both panels visible, accessing files on the left panel would fail until TAB was used or an external command executed.
- If a file's time stamp was in the future the %age function would treat the file as very old.
Minor Enhancements
- Support for ZIPs made by unix-heads who insist on putting a totally redundant ./ at the front of paths.
- Editor: Undo/Redo is now persistent between edits of the same file, just like the cursor position is.
- It's now possible to jump directly into an archive using stored path recall, directory history etc.
Bug Fixes
- Archive reading would crash on archives with more than 32768 entries.
- Found files list box wasn't being updated properly after deleting files from it with F8.
- Using Alt-F9 while panels are turned off with Ctrl-O results in incorrect display when they are turned back on.
- Win9x only: Fix calculation of total and free disk space on Info panel, was wrapping around at 4GB.
- Directory Compare's 'Tag Older' option was tagging older or same date.
New Features
- Hot keys to change to previous / next file in panel or File Find results when using internal viewer (Alt-Up/Down).
- Position memory for viewer.
- Support for HA archiver.
- Support for GZip files.
- Support for TAR files (and thereby tar.gz files).
- File Find: Added function to delete ALL found files (Shift-F8).
- Editor: Append to clipboard function added (Ctrl-Shift-Insert).
- File Case: optionally recurse subdirectories, modifying files/directories/both.
- Brief-Wide view, like Brief view but 2 column instead of 3.
- File Find: Search multiple drives.
- Panels now adjust their spacing to use any number of columns, not just 80 and 132.
- Added bookmarking facility to editor using Ctrl-Shift-[Num 0-9] and Ctrl-[Num 0-9].
- Provide built-in commands $view and $edit to access the internal viewer & editor.
- Added a separate section in the INI file for directory entry colourization.
- Editor: Added Alt-Comma & Alt-Dot functions to find previous/next occurance of the word the cursor is on.
- Editor: Added Ctrl-W function, mark & copy word.
- Editor: Added Ctrl-D function, duplicate line.
- Editor: Added Ctrl-Space which copies 1 character from line above and Alt-Space which copies remainder of line above.
- Added drive mapping display to the drive change panel in place of the volume label for network drives.
Minor Enhancements
- Editor: Ctrl-A selects all text.
- Add drop down history to Shift-F3/4 dialog.
- Viewer: Allow browsing files that are larger than 2GB.
- Column separator lines on Full/Wide view panels are now consistently the same colour, regardless of the text around it.
- Viewer: Adjusted hex view layout to allow 8 digit offset, providing correct display for files up to 4GB.
- Added 'follow' mode in viewer (Alt-F), follows the end of a growing file.
- Added ability to abort a directory compare when comparing file contents.
- Alt-\ now works in Copy/Move dialog, allowing selection of a recently visited directory as the target of the copy/move.
- Ctrl-Shift-F/J now works in File Find result list to copy the full path/name of the file to the clipboard.
- Added command history reverse search function with Shift-Ctrl-J/Enter.
- When a file name won't fit in the space available on a panel, keep the extension visible.
- Added support for Win2K's directory mount points when getting disk space.
- Clear ReadOnly attribute on files from DVD (UDF file system) as well as CD.
Bug Fixes
- !L wasn't putting spaces between file names.
- After using Alt-Enter (Shift-ENTER on Win32), command history position wasn't being reset like it is when just using Enter.
- File Find: Fixed corrupt display when deleting the only match while search is still running.
- Fixed User Menu where last characters of menu text were being truncated if they were non-English.
- Fixed case sensitivity of directory tree quick search with non-English characters.
- Wasn't handling Win32 ARJ self extracting files.
- Fixed redirection of input/output from/to a quoted file name.
- Fixed bug where the handling of leading ./ on paths in archives didn't work if there were no other /'s in the path.
- When reading an archive's file list, prevent junk showing as the read count if the first read takes a while.
New Features
- Trees now work in archives, including "Retain Dir Count".
- Enable Ctrl/Alt/Shift-Fkey in user menu.
- Add multi-file search/replace function to file finder (Ctrl-R).
- Syntax highlighting in the editor.
- Make tree views able to expand/collapse branches. Controlled with Grey +/- and Ctrl-Grey +/-. Default tree state can be configured with the ExpandedTrees switch in fc.ini.
- Add "All Older" option to the overwrite confirmation dialog.
- Added support for sub-menus of user menus.
- Add support for UNC paths, including browsing of servers and shares.
- In File Find, enable F5/F6 to copy/move all files in the found list.
- In File Find, Delete key removes an item from the found list.
- Display "dirinfo" file in the lower section of the Info panel. Double click of same area or F4 edits the dirinfo file.
- Add built-in "set" command & [Environment] INI file section, allowing environment variables to be changed for executed commands. The set command allows temporary changes while the INI file section allows more permanent settings.
Minor Enhancements
- Support file sizes >4GB in RAR archives.
- Support ZIP files with more than 64k files.
- Make Alt-F9 more like Shift-Alt-F9 in that it toggles between 25, 50 & custom number of lines.
- Change Ctrl-\ to exit the current archive if we're in one rather than going all the way to the root of the drive.
- Add sticky select mode to editor with Alt-S.
- Add progress indicator to editor file loading & saving.
- Remove limit of 4000 matches in File Find.
- Include value of PathAppend configuration directive in the PATH environment variable of spawned processes.
- Support environment variable references in stored directory paths.
- Change File Find to search directories in alphabetical order instead of the LIFO stack it was using.
- Add !tx operator, like !t but chops the extension. Handy for converting files where the program requies both input & output file names & you want to change the extension.
- Speed up loading of a large command history when MaxHist is set high.
- Allow user menu commands to be up to 4096 characters long, up from 259.
- Calculate Directory Size: Allow "Total Size" display more room.
- TAR reading: take notice of unix directory mode flag as well as trailing slash when deciding if an entry is a directory or file.
- Use more efficient memory allocator for storing text lines in editor for faster loading of large files.
- Optimise use of space in the panel status line when showing quantity & size of tagged files.
- Add / and ? keys to viewer as search forwards/backwards as in many unix tools (less, vi etc).
- Added Shift-TAB seek name completion.
Bug Fixes
- Fix bug where retained directory size counts would get reduced when browsing directories containing hidden files with "hidden files" option off.
- Editor: Ctrl-Space wouldn't copy characters >127
- Using Ctrl-U didn't swap the panels' filters.
- In file find results, shift F8 deletion of directories doesn't recognise Cancel & All option persists between repeated uses.
- Prevent crash in File Find when searching a path more than 260 characters long.
- Fix retrieval of a stored path that's inside an archive via the Alt-F5 stored path dialog.
- Fix menu colouring so that both forground & background of menu highlight bar can be configured.
New Features
- Support includes in user menu files.
- Unix port (Linux, FreeBSD, OpenSolaris).
- Win64 port.
- Use Unicode for all file names on Windows & Unix.
- Syntax highlighting in the viewer.
- Viewer and editor support for Unicode text files.
- Symbolic link support in Unix & Windows.
- Panels display a link's target.
- Ctrl-Shift-F5 creates a link.
- F8-Delete knows not to recurse into a link to a directory.
- Support for 7zip archives.
- Support for bzip2 files.
- Scroll back viewer to browse previous program output.
- File Information display (Ctrl-I) shows complete file metadata.
- Ctrl-M displays mount point selection list with eject function
Minor Enhancements
- Change the search match highlight colour in the viewer from "Menu Bar" to "Highlight" which is consistent with the editor and more sensible.
- Preserve the case of environment variable names.
- Case insensitive matching is now Unicode based so will work with all languages.
- Allow re-sorting of File Find results before search has finished.
- Use a separate thread to update the file copy progress box to reduce flicker and improve copy speed.
- Editor: line length limit of 64kB removed.
- Added new syntax highlighting directive, "statechange" which allows more flexible state transitions.
- Added includes in syntax definition file.
- Add support for Unicode file names in RAR archives.
- TAR file support improvements
- Fix checksum calculation when there are bytes in the header >127.
- Interpret file names as UTF-8.
- Added field in File Find to specify the code page used when searching files for the "Containing" string.
- Copy/Move: Add ability to specify overwrite mode in the initial dialog so that you don't have to wait for the first collision to occur.
- Add !lf operator to provide a list of tagged files with their full path.
- Add !tf (tagged file with full path).
- Add ability to remove an entry from command history with Delete key.
- Syntax Highlighter: Add /w flag for syntax states of "word scope" to assist with LISP keywords.
- Syntax Highlighter: Enable word characters to be redefined for each state.
Bug Fixes
- User Menu: Make menu item hot key work if specified in lower case in the mnu file. This used to work in 2.20 but was broken while adding support for sub-menus.
- Fix display of hex view when code page translation is active. Was "translating" the vertical bar separators.
- Fix file copy ETA overflowing copy progress dialog & causing screen corruption when a huge file copy starts off slowly.
- In Change Case, mixed mode should not capitalise the character after an apostrophe.
- In viewer, fix background colour of line continuation markers (right arrow at the end of a line that's longer than the window when unwrapped).
- Multi-file search/replace confirmation prompt, extend box width if necessary to fit the text values and don't overflow box if text still won't fit.
- Fix !F when opposite panel is showing an archive's contents.
- Fix !t behaviour in archives.